Shutter speed
Shorter for fast, bright aurora; longer when faint and still.
Photography guide
The aurora is faint, fast-moving and almost invisible to phone cameras on auto. These are the camera settings, lenses and field techniques our guides use on real hunts in Rovaniemi.
Reading the settings
Starting points for a typical display. A bright, fast aurora may only need 3 seconds at ISO 800.
Shorter for fast, bright aurora; longer when faint and still.
Start at 1600 and raise it if the display looks too dark.
As wide as the lens allows. This is the single biggest factor.
Autofocus hunts in the dark. Set focus manually and lock it.
Non-negotiable. Even a 5 second handheld exposure will blur.
Auto and semi-auto modes fail in near-darkness.
Camera body
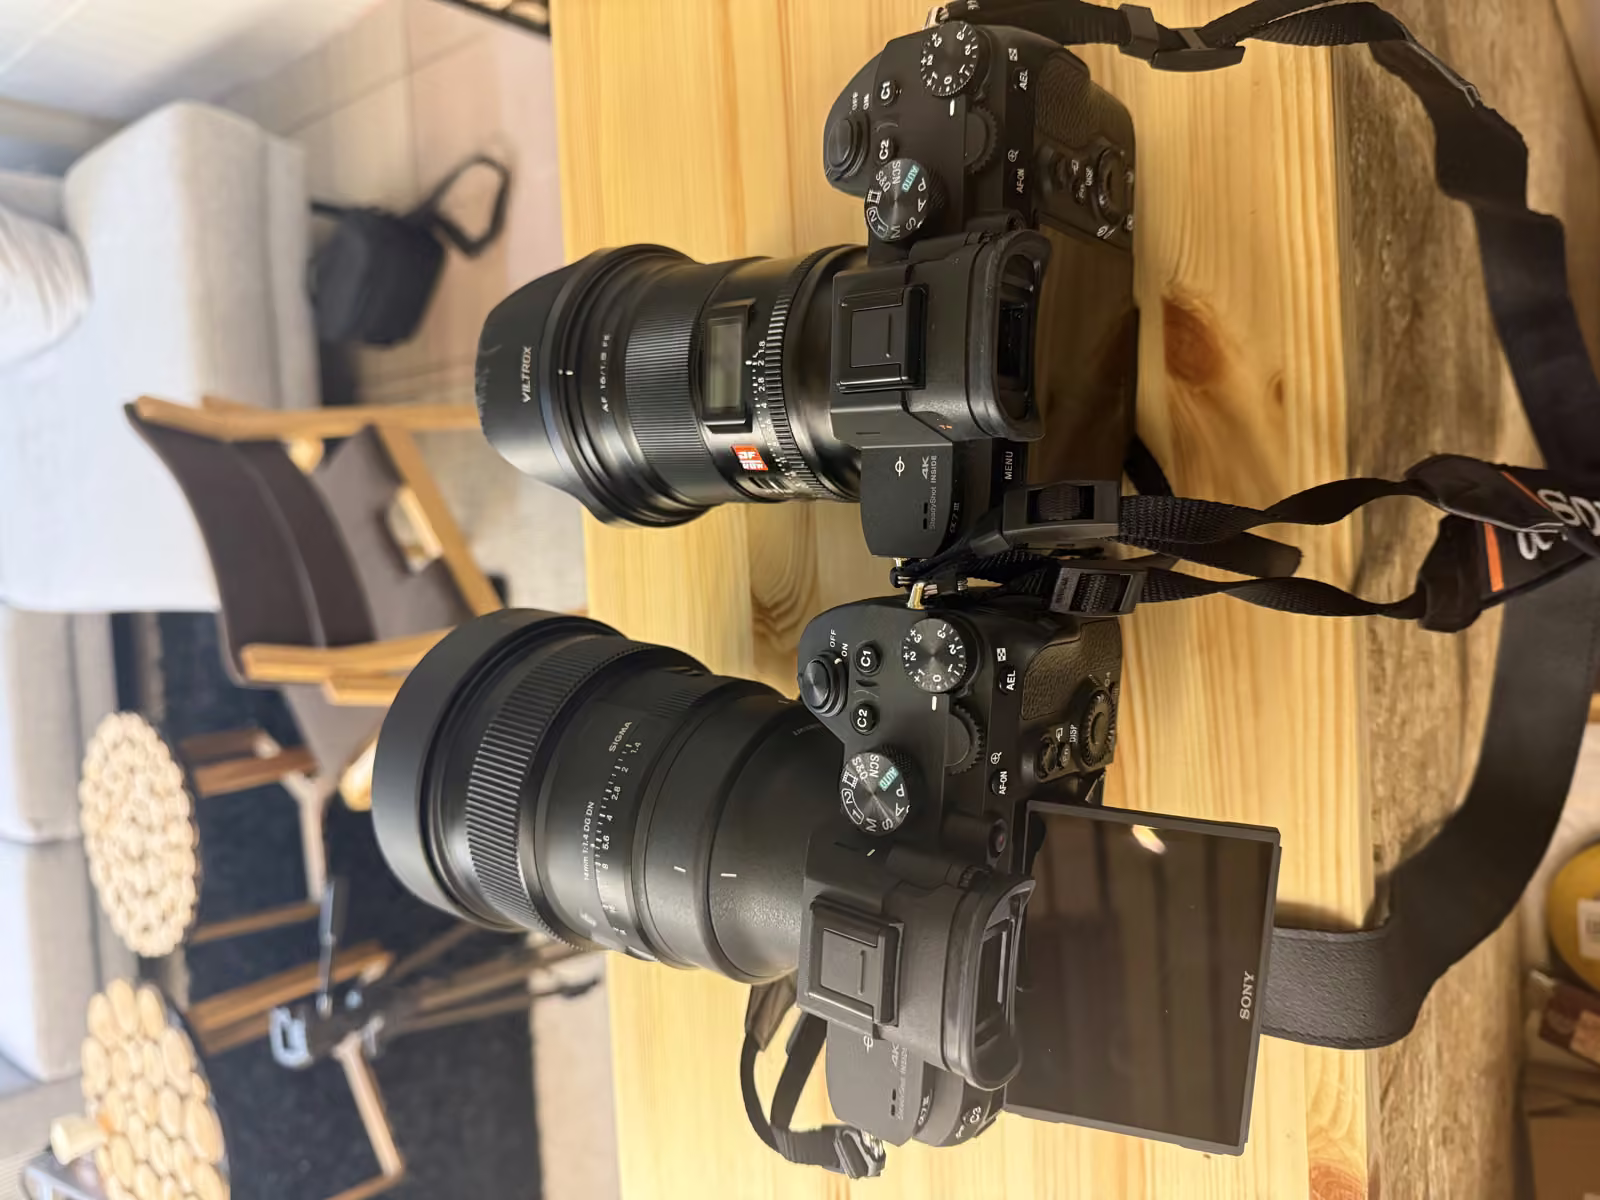
There is no single right camera-and-lens combination. A photographer who knows their own kit will beat someone carrying expensive gear they have never used. We shoot Sony A7 series bodies because they balance low-light performance, lens choice and value well.
Nikon Z, Canon R and Fujifilm X-T bodies are also capable. DSLRs can work too, especially with a fast wide prime. The body matters most on faint nights, when clean high-ISO performance pulls ahead.

Lenses
Aperture decides how much light reaches the sensor. An f/1.4 lens gathers four times more light than f/2.8, which means shorter exposures and less motion blur when the aurora dances.
The sweet spot is 14-24mm full-frame equivalent: wide enough for the full aurora band and the landscape below. Around 35mm is the longest practical focal length for most aurora scenes.
Fast prime lenses, maximum light, sharpest results.
Quality zooms and primes are workable; raise ISO slightly.
Kit-lens territory. Fine on bright nights but risky on faint ones.
Too little light without extreme noisy ISO.
Technique
We rarely lock one setting for the whole night. A bright, fast aurora wants shorter exposure; a faint, still one wants longer. Our instinct is the shortest shutter we can get away with, especially when guests are in the frame.
Turn autofocus off, focus on a bright star or distant light, then zoom into the preview to confirm sharp points.
Pressing the shutter shakes the camera. A timer or remote lets vibration settle before the exposure starts.
Do not trust the screen brightness in the cold. Use the histogram and adjust ISO or shutter from there.
3200-4000K keeps the sky naturally cool. Shoot RAW so you can fine-tune later.
Cold drains batteries fast. Keep a spare warm in an inside pocket.
Drop to 2-5 seconds and raise ISO to freeze the shapes instead of smearing them into green fog.
Phone cameras
Yes, on a strong display. Use Night mode or Astro mode, avoid telephoto and ultra-wide lenses, keep the phone steady and tap the sky before shooting.
It runs a multi-second exposure automatically.
Rest the phone on a snowbank, tripod, backpack or car roof.
Use 5-10 seconds, ISO 800-1600 and focus to infinity for more control.
Autofocus often locks onto foreground snow. Tap the sky before shooting.
FAQ
Start in manual: shutter 5-15 seconds, ISO 1600-3200, aperture as wide as possible, and manual focus at infinity. Adjust from there based on brightness and movement.
Yes. Recent iPhone, Samsung and Pixel models can capture aurora in Night or Astro mode. Keep the phone very steady and expose for several seconds.
Yes. Aurora photos need multi-second exposures. A small travel tripod is enough, but handheld shots usually blur.
A fast wide prime, ideally 14-24mm at f/1.4-f/1.8. The fast aperture lets in enough light to keep exposures shorter.
No. Professional photos are included on every hunt. Bring your own camera or phone if you want, and your guide can help with settings.
RAW whenever possible. It preserves more data for white balance, highlight recovery and noise reduction. RAW+JPEG is a practical fallback.
Your guide photographs you under the aurora, then sends edited images after the tour.
Book your hunt